
This blog will cover some of the best practices that can be applied to create QGIS plugins. To create a custom QGIS plugins we need to install the following two plugins which will make the creation process easier.
Creates all the necessary for a plugin.

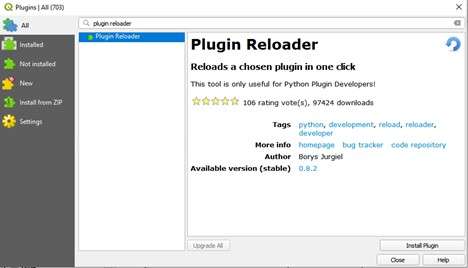
Using this plugin, you can change your plugin code and have it reflected in QGIS without having to restart QGIS every time
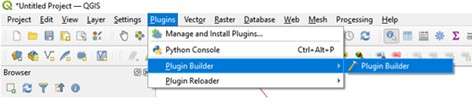
Plugin Builder provides you a working template from which you can create your own plugin.
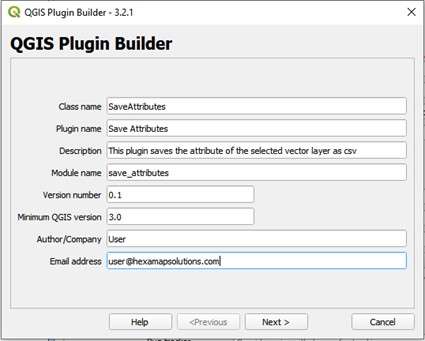
This is the name that will be used to create the Python class for your plugin. The name should be in CamelCase with no spaces. Plugin Builder will accept an all-lower case class name but this should be avoided since it isn’t in line with Python coding style. Examples of valid class names are:
This is the name that will be used to create the Python module (file) for your plugin. The name should be in lowercase with words separated using underscores. Plugin Builder will accept any case module name, but this should be avoided since it isn’t in line with Python coding style. Examples of valid module names are:
This is a title for your plugin and will be displayed in the QGIS plugin manager and the plugin installer. It will also be used as the menu name that appears in the QGIS Plugin menu. You can use the Class name or make it more readable. Some examples:
This is a one-line description of the plugin’s function and is displayed in both the Plugin Manager and Plugin Installer. Keep it short yet descriptive so the purpose of the plugin can be easily determined.
This is the version number of your plugin. Plugin Builder suggests 0.1, but you can start with any number. The Plugin Installer uses the version number to identify which plugins you have installed are upgradeable, so it is important to increment it as you release new versions.
This is the minimum version of QGIS required for your plugin to work. If your plugin uses features only present in a newer version, be sure to set this field accordingly to prevent problems for those running older versions. Version 3.x of Plugin Builder defaults this field to 3.0.
Put your name or company name here—this information is used in writing the copyright statement in the source files of your plugin, as well as being displayed in the Plugin Installer and on the QGIS plugin repository.
Put an address where users of your plugin can contact you. This information is written to the copyright header of your source files and displayed on the QGIS plugin repository listing for your plugin.
This is a long line description of the plugin’s function (purpose, function, requirements, etc.). This field is required.

Choose which type of plugin you want to create.
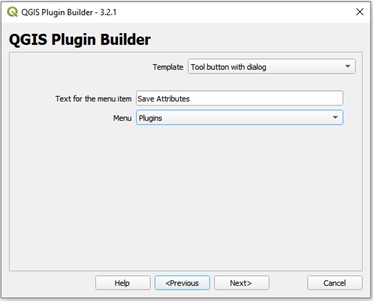
For the default template “Tool button with dialog” you get the following parameter fields:
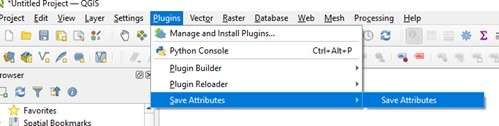
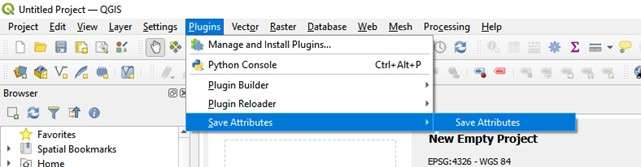
This is the text that will appear in the menu. In the example below, the plugin name is Save Attributes and the text for the menu item is displayed to the right of it:
Choose an appropriate location for your plugin’s menu based on its main functionality. This will place your menu under one of the following main menus:
If none of the specific categories apply (Database, Raster, Vector, Web), choose Plugins. Your choice is also written to the category field in metadata.txt.
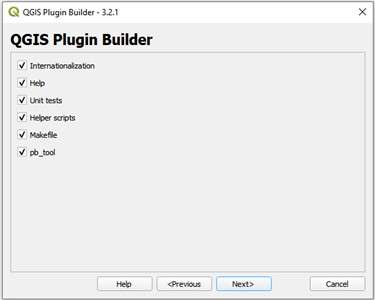
The Plugin Builder address several additional components to your plugin, which are recommended, but not strictly required.
A stub for adding translated texts to your plugin.
Creates a Sphinx template for generating a HTML help. (Sphinx is a tool that makes it easy to create intelligent and beautiful documentation,)
Creates a basic set of unit tests for your plugin.
Adds a helper script for publishing your plugin on http://plugins.qgis.org/ and additional scripts for internationalization and testing.
Adds a Makefile for building your plugin with GNU make
Genrates a configuration for pb_tool, a Python command line tool for compiling and deploying QGIS plugins on Linux, Mac OS X, and Windows.
It is strongly recommended that you use pb_tool rather than make for building and deploying your plugins.
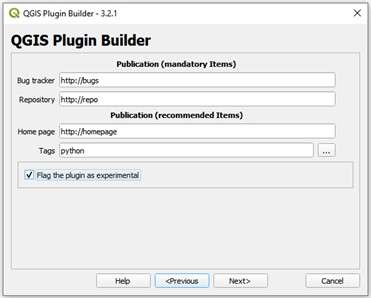
There are several fields that you should seriously consider completing when publishing a new plugin. This will help ensure your plugin is accepted and users can be successful using it.
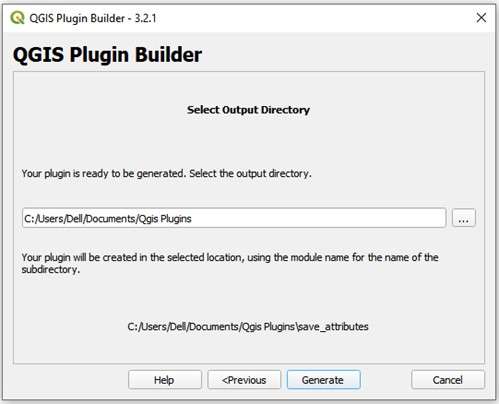
Select a folder to save the plugin.
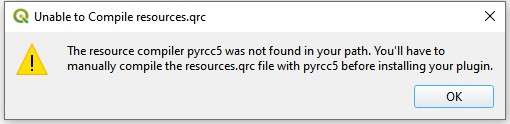
If pyrcc5 is not found in your path, you will see:
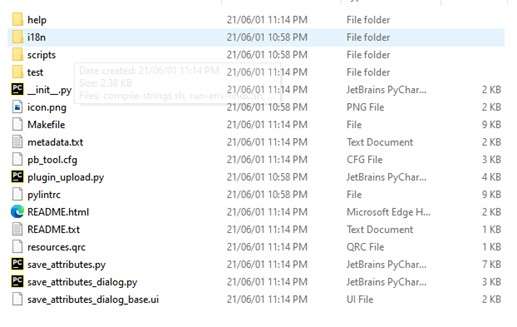
The following files will be present in the selected folder.
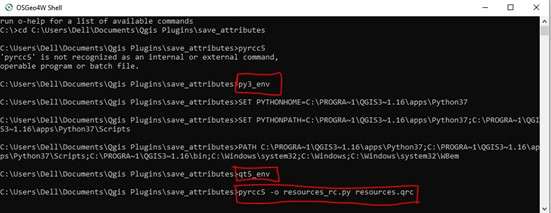
In the start menu search for OSGeo4W and open it.
If pyrcc5 is not found enter the following and press enter:
After that enter the following command to compile the resource file
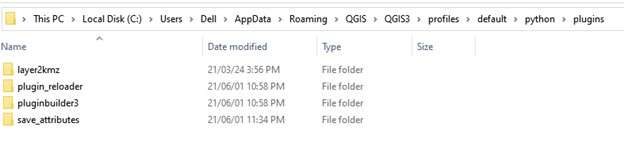
Copy the save_attributes folder and paste it in the following location
~usr/AppData/Qgis/Qgis<version>/profiles/default/plugins
Restart QGIS and click on the plugins tab to see the plugin listed there. If it’s not listed then click on manage and install plugins and enable your plugin.
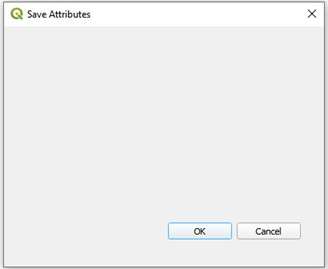
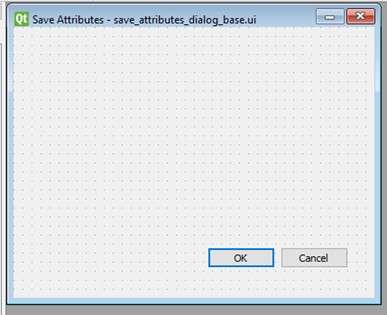
If you click on the plugin a dialog box will appear
Qt Designer is the Qt tool for designing and building graphical user interfaces (GUIs) with Qt Widgets. You can compose and customize your windows or dialogs in a what-you-see-is-what-you-get (WYSIWYG) manner and test them using different styles and resolutions.
Search for Qt Designer from the start menu and open it.
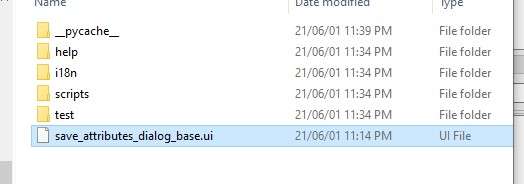
After opening the Qt Designer, open the .ui file present in the plugin folder
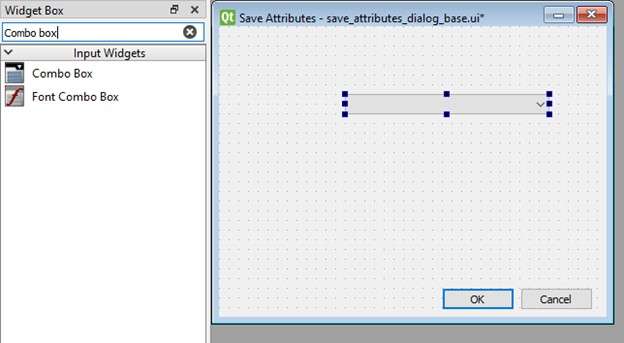
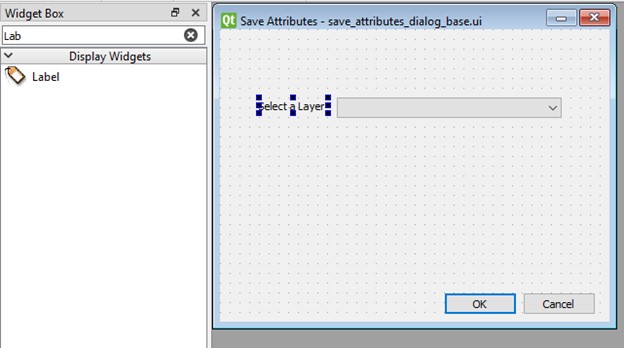
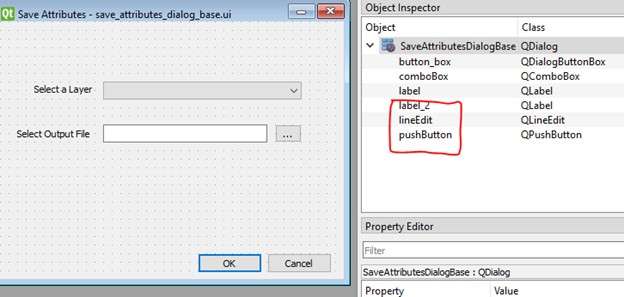
In the dialog add the widgets shown in the following images
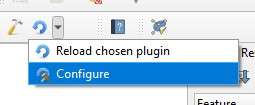
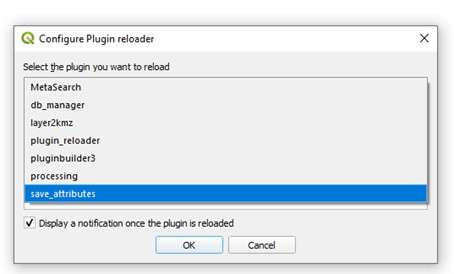
After modifying the save attributes dialog, reload it using the Plugin Reloader plugin
Configure the plugin reloader to load the save attributes plugin.

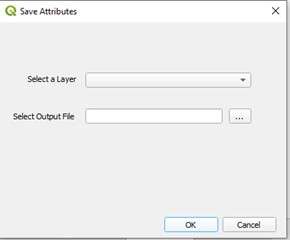
If you open the save attributes plugin, you will be able to see the widgets that we included in the previous steps
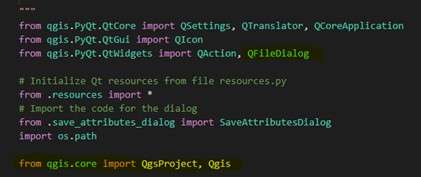
Open the save_attributes.py file in an IDE present in the plugin folder

Add the following import statements.
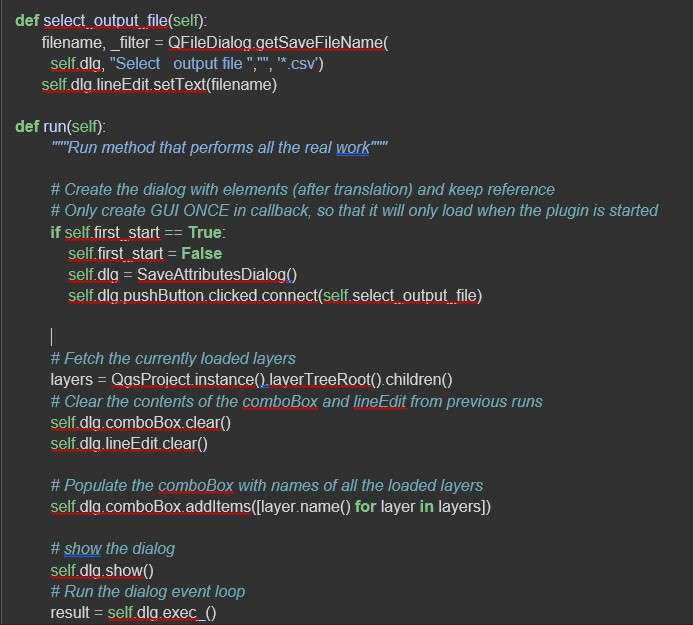
In that resources.py file, you will see a method called run. The run method is the method that will perform all the real work.
Delete the existing run method and add the following two methods to the bottom of the file.

Reload the plugin and try to export a layer attributes and test it.
Ramkumar S is GIS Consultant, who is Well-spoken and Cheerful. His Specialties include quickly learning new skills and programming languages, problem solving and domain driven design.